Ryujinx Setup Guide for Windows, macOS, and Linux
Set up Ryujinx on your preferred platform with our easy guides. Choose your operating system below to install this Nintendo Switch emulator, add firmware, and start gaming safely.
Set Up Ryujinx on Windows
Follow this step-by-step guide to set up Ryujinx on your Windows PC using the final release (v1.1.1403). We'll cover everything from requirements to firmware installation for this Nintendo Switch emulator.
Requirements for Windows
To use Ryujinx on Windows, your computer needs:
- At least 8GB RAM (16GB recommended for optimal performance).
- A GPU supporting OpenGL 4.5 or Vulkan 1.2 or higher, with up-to-date drivers.
- Your prod.keys file and either a dumped firmware or an untrimmed XCI game cartridge.
- Your legally dumped Nintendo Switch games or homebrew applications.
- Windows 10 RS4 (Redstone 4, version 1803) or newer.
A recommended baseline system for native resolution and framerate includes:
- CPU: Ryzen 5 3600
- RAM: 16GB DDR4
- GPU: NVIDIA GTX 1060 6GB
Placing Your prod.keys File
Ryujinx stores its files in %appdata%/Ryujinx by default, including firmware, saves, and configs. Here's how to place your prod.keys:
- Download Ryujinx and extract the contents of the publish folder to a location of your choice (avoid using the desktop or root of a drive, as these may be protected).
- Navigate to the extracted Ryujinx files and double-click
Ryujinx.exeto launch the emulator. You’ll see a warning message (this is normal). - Click OK on the warning box. This creates the necessary folders in
%appdata%/Ryujinx. - In Ryujinx, click File > Open Ryujinx Folder to navigate to
%appdata%/Ryujinx. - Go into the
systemsubfolder and paste yourprod.keysfile here. The structure should look like:%appdata%/Ryujinx/system/prod.keys. - Close and reopen Ryujinx to validate the prod.keys file. You’re done installing the keys!
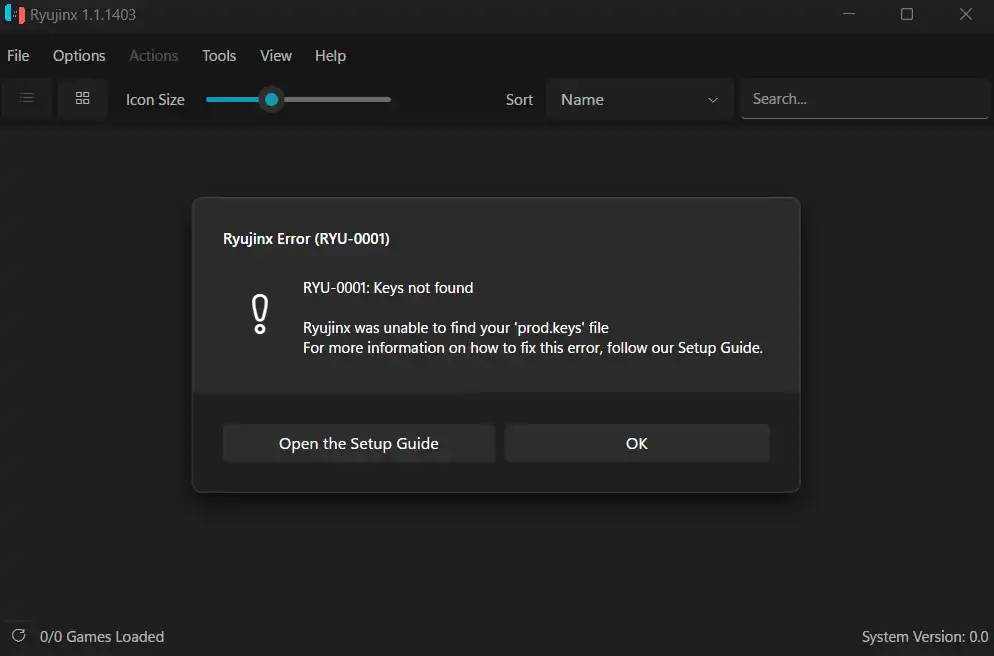
Ryujinx warning box on first launch
Installing Firmware on Ryujinx
Now that your keys are installed, let’s add the firmware using an untrimmed XCI or ZIP file:
- Open Ryujinx. If the prod.keys warning persists, revisit the previous steps to ensure correct placement.
- In Ryujinx, click Tools > Firmware > Install from XCI/ZIP. This opens the firmware selection window.
- Navigate to your dumped XCI or ZIP file, select it, and click Open. Confirm the installation when prompted (ensure your prod.keys match or are newer than the firmware version).
- Click OK. If successful, the firmware version will appear as the “System Version” in the bottom right of the Ryujinx window.
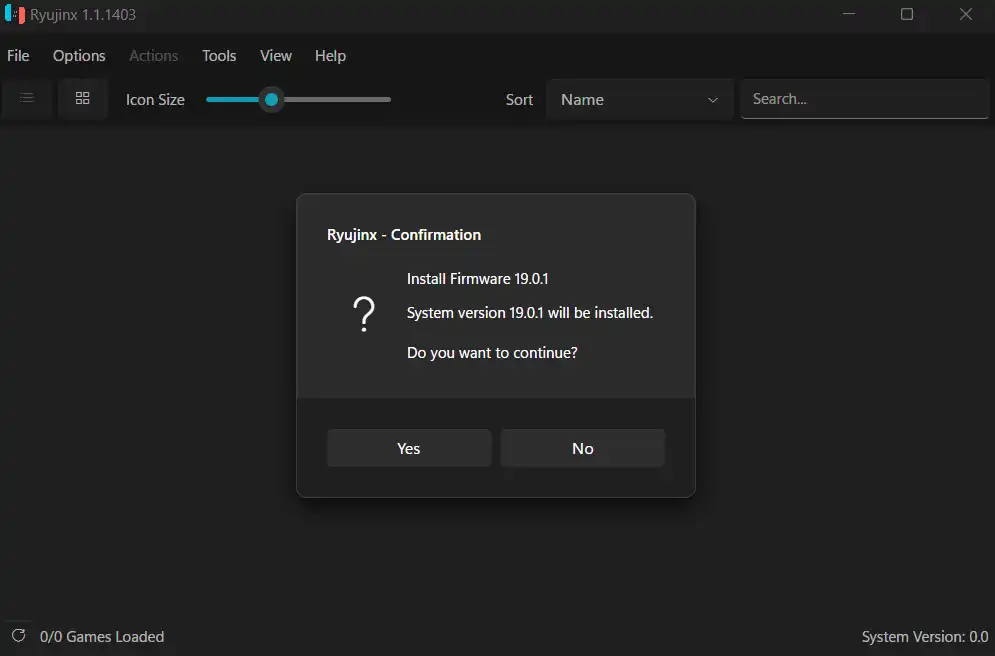
Ryujinx firmware installation window
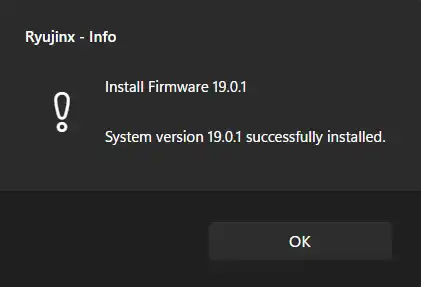
Ryujinx firmware installation confirmation message
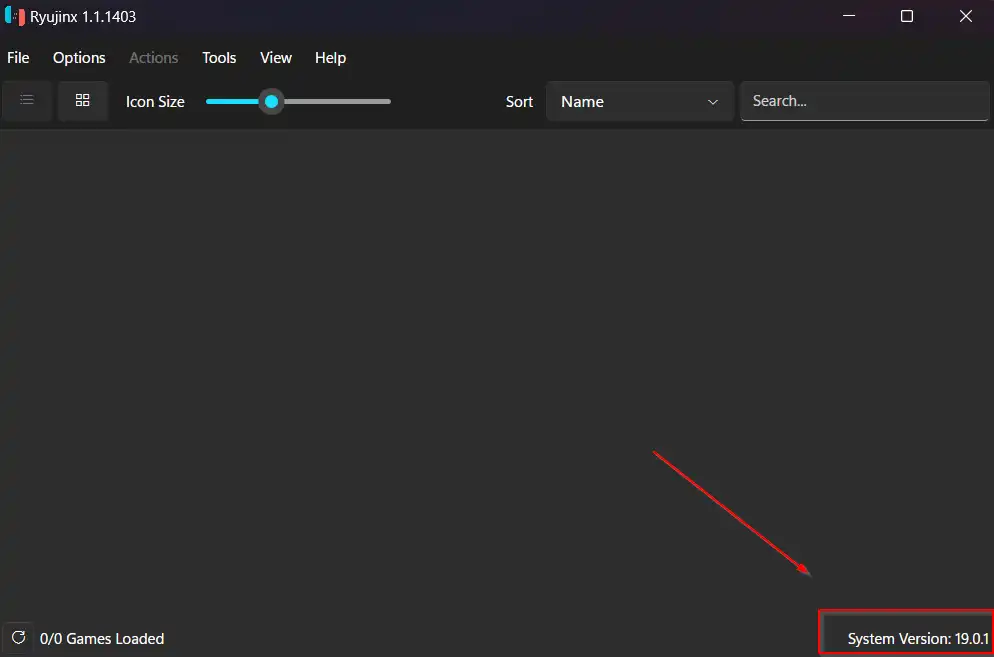
Ryujinx system version displayed after firmware installation
Set Up Ryujinx on macOS
Follow this step-by-step guide to set up Ryujinx on your macOS system, compatible with both Intel and Apple Silicon (M1/M2) Macs. Play Nintendo Switch games safely and efficiently with this emulator.
Prerequisites for macOS
Before setting up Ryujinx, ensure you have the following:
- Nintendo Switch Firmware: Download the firmware from a trusted source like darstoney.net (we do not condone piracy; ensure you own a Nintendo Switch).
- Ryujinx for macOS: Download the macOS version from the official Ryujinx website.
- prod.keys File: Obtain your prod.keys file legally (e.g., by dumping it from your own Nintendo Switch). This is required to run games and firmware.
Important: This guide is for educational purposes only. We recommend owning a Nintendo Switch and legally dumped games to ensure compliance.
Installing Ryujinx on macOS
Follow these steps to install Ryujinx on your Mac:
-
Extract the downloaded Ryujinx package and move it to your Applications folder.
-
Launch Ryujinx by double-clicking the application or using Spotlight (Command + Space, search for "Ryujinx").
You may see a security warning.
-
To bypass the security warning, go to System Preferences > Security & Privacy, and click Open Anyway.
This is a one-time action unless you reinstall Ryujinx.
-
Install the prod.keys file: In Ryujinx, click File > Open Ryujinx Folder, navigate to the
systemsubfolder, and paste yourprod.keysfile here. -
Close and reopen Ryujinx to validate the prod.keys file.
The error message should no longer appear.
-
Install the firmware: In Ryujinx, click Tools > Install Firmware > Install from ZIP.
Select your downloaded firmware ZIP file and confirm the installation.
If it takes too long, restart Ryujinx and retry.
Configuring Ryujinx Settings
Configure Ryujinx for optimal performance on macOS:
-
Add game directories: Go to Options > Settings > Game Directories, click Add, and select a folder for your games (e.g., a "Games" folder, not the Desktop for permanent storage).
Click Apply to load games.
-
Set up controls: In Settings > Input, configure your keyboard or controllers (e.g., Joy-Con, PS4/PS5, Xbox).
Select "DInput" as the controller type for most games, and save profiles for different games or players.
-
Set system region and time: In Settings > System, select your region (e.g., London for GMT) and set the correct time.
Some games require this for proper functionality.
-
Adjust graphics and audio: In Settings > Graphics, keep settings on Auto unless you know what you're doing.
Use a 16:9 aspect ratio, native resolution, and start with low settings, increasing as needed.
For Audio, ensure SDL2 is selected.
Launching and Playing Games
Now that Ryujinx is set up, start playing your games:
-
Double-click a game in the Ryujinx library (e.g., New Super Mario Bros. U Deluxe) to launch it.
-
Toggle full-screen mode: Use the full-screen button or View > Toggle Full Screen to play in full-screen.
Adjust volume, VSync, and aspect ratio as needed.
-
Check the compatibility list: Visit the Ryujinx compatibility list to ensure optimal settings (e.g., some games work better in handheld mode vs. docked).
For additional support or to ask questions, join our community or the official Ryujinx Discord.
Set Up Ryujinx on Linux
Follow this step-by-step guide to set up Ryujinx on your Linux system. Ryujinx is a Nintendo Switch emulator that lets you play your favorite Switch games safely and efficiently.
Prerequisites for Linux
Before setting up Ryujinx, ensure you have the following:
- Ryujinx for Linux: Download the Linux version from the official Ryujinx website.
- Nintendo Switch Firmware: Download the firmware from a trusted source like darstoney.net (via archive.org or Mega). We do not condone piracy; ensure you own a Nintendo Switch.
- prod.keys File: Obtain your prod.keys file legally (e.g., by dumping it from your own Nintendo Switch or searching online). This is required to run games and firmware.
- A Nintendo Switch Game: Use a legally ripped game from your Nintendo Switch (e.g., New Super Mario Bros. U Deluxe).
Important: This guide is for educational purposes only. We recommend owning a Nintendo Switch and legally dumped games to ensure compliance.
Installing Ryujinx on Linux
Follow these steps to install Ryujinx on your Linux system:
-
Extract the downloaded Ryujinx package to your preferred location (e.g., Downloads folder).
You don’t need to extract the firmware ZIP file; Ryujinx will handle it.
-
Open a terminal and navigate to the extracted Ryujinx folder (e.g.,
cd ~/Downloads/ryujinx/publish).Launch Ryujinx by running the
ryujinxexecutable: Drag the file into the terminal and press Enter, or run./ryujinx.You may see a "keys not found" error—this is normal and will be fixed in the next step.
-
Install the prod.keys file: In Ryujinx, click File > Open Ryujinx Folder, navigate to the
systemsubfolder, and paste yourprod.keysfile here. -
Close and reopen Ryujinx using the same terminal command.
The "keys not found" error should no longer appear.
-
Install the firmware: In Ryujinx, click Tools > Install Firmware > Install from XCI/ZIP.
Select your downloaded firmware ZIP file and confirm the installation.
The process is quick; if it takes too long, restart Ryujinx and retry.
Configuring Ryujinx Settings
Configure Ryujinx for optimal performance on Linux:
-
Add game directories: Go to Options > Settings > Game Directories, click Add, and select a folder for your games.
Click Apply and Save to load games. You can add multiple directories or open individual game files via File > Open Application from File.
-
Set up controls: In Settings > Input, configure up to 8 controllers (e.g., keyboard, Joy-Con, Pro Controller).
Change button mappings as needed, select a controller type (e.g., Pro Controller), and save profiles for different games or players.
-
Set system region and time: In Settings > System, set your region (e.g., Europe) and language (e.g., British English).
Adjust the time zone if it doesn’t detect automatically—some games like Animal Crossing require this.
-
Adjust graphics settings: In Settings > Graphics, enable shader caches and set anisotropic filtering to Auto to fix texture issues at obscure angles.
Keep resolution scale at Native unless your system can handle higher (e.g., 4x). Use a 16:9 aspect ratio to avoid game issues.
Launching and Playing Games
Now that Ryujinx is set up, start playing your games:
-
Double-click a game in the Ryujinx library (e.g., New Super Mario Bros. U Deluxe) to launch it.
Loading time depends on your system’s performance and the game.
-
Toggle between handheld and docked modes: In Ryujinx, switch modes to resolve issues like black screens or missing sound (some games work better in handheld mode).
You can also toggle full-screen mode via Options > Start Games in Full Screen.
-
Check the compatibility list: Visit the Ryujinx compatibility list to ensure optimal settings for your game (e.g., minimum system version, mode preferences).
For additional support or to ask questions, join our community or the official Ryujinx Discord.